This is the full reading path and setup checklist to replicate the LearnAI Claude Code environment on a new machine — from zero to a working agent harness with /goal, Codex review gate, oh-my-claudecode, and spec-driven workflows. Each layer builds on the last. Estimated time: 2-4 hours for a complete setup.
This hub collects the most important entries across this wiki into a single ordered path. Follow it top to bottom if you’re starting fresh, or jump to the layer that matches where you are.
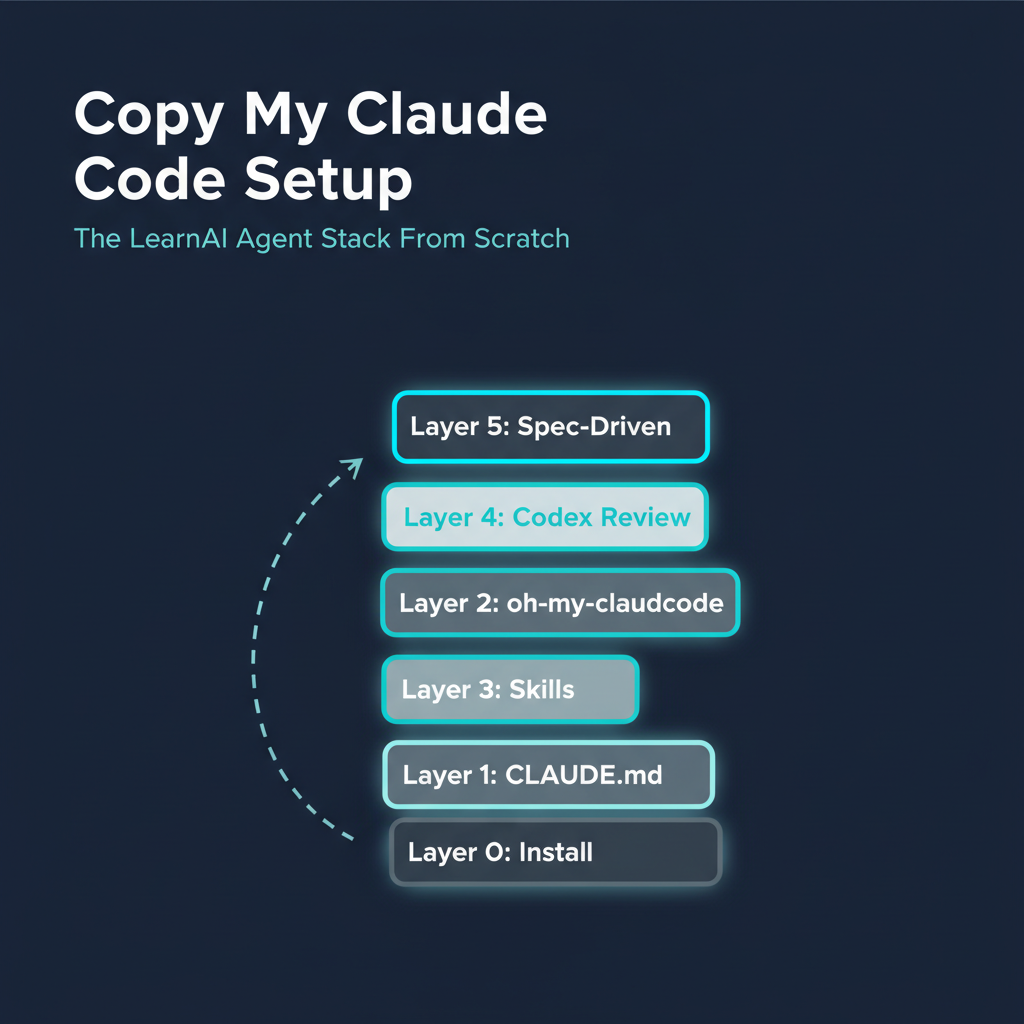
The Stack at a Glance
Layer 0: Claude Code installed + API key
    ↓
Layer 1: CLAUDE.md — your global instructions (the most important file)
    ↓
Layer 2: oh-my-claudecode — orchestration plugin (/goal, /pause, agents)
    ↓
Layer 3: Skills — power tools for specific tasks
    ↓
Layer 4: Codex review gate — second-opinion AI that catches your mistakes
    ↓
Layer 5: Spec-driven workflow — spec.md → /goal → /pause → done
    ↓
Layer 6: Long-running sessions — orchestrator + headless pattern
Layer 0 — Foundation: Install & Mental Model
Time: 45 min
Start here if you’ve never used Claude Code or have only used it casually.
| Entry | What you’ll get |
|---|---|
| Claude Code 101 — Anthropic’s Official Onboarding Course | Official 6-session onboarding: slash commands, memory, MCP, agents. The baseline everyone needs. |
| Boris Cherny on Claude Code — Origin Story & Philosophy | Why Claude Code works the way it does. Mental model from the creator. Read this before anything else. |
| Karpathy Skills — Four Rules That Fix LLM Coding’s Worst Habits | Karpathy’s four rules: read the error, google with specifics, embrace frustration, start small. Non-negotiable baseline. |
Install:
npm install -g @anthropic-ai/claude-code
claude
Layer 1 — CLAUDE.md: Your Global Instructions
Time: 30 min (reading + writing your own)
CLAUDE.md is the single most powerful file in your Claude Code setup. It defines how the AI behaves in every project — your defaults, your rules, your constraints. Everything else layers on top of it.
What belongs in CLAUDE.md:
- Your name and how you want to be addressed
- Global workflow rules (Codex review gate, git safety, test-first)
- Project-type-specific patterns (Next.js pitfalls, Docker notes, AWS SSH)
- Thinking-partner mode instructions
Example CLAUDE.md sections:
# User
Call me Q. Always.

# RULE #1 — Codex Review Gate
After completing ANY task, automatically send output to Codex for review.

# Git Safety
NEVER push to remote without asking first.

# How I Learn
Explain the "why" not just the "what". Draw ASCII diagrams for systems.
Read: SpecOps — Spec-Driven Development with AI Coding Agents — covers how to write specs that anchor your CLAUDE.md rules to specific tasks.
Layer 2 — oh-my-claudecode: The Orchestration Plugin
Time: 20 min
oh-my-claudecode adds the /goal, /pause, agent roles, and multi-AI orchestration. This is the scaffolding that turns Claude Code from a chat into an agent harness.
Install:
npm install -g oh-my-claudecode
omc setup
| Entry | What you’ll get |
|---|---|
| oh-my-claudecode — Multi-AI Orchestration Plugin | What it is, why it matters, what /goal and /pause do. |
| /goal 使用指南 — The Visual Playbook | How /goal works: the loop, the evaluator, pause discipline, done conditions. |
| Using /goal for Wiki Management | Real-world example: spec.md → /goal → /pause → push for a 10-entry wiki batch. |
| Beyond /goal — Orchestrator + Headless Pattern | For sessions that run 1-2 hours: separate orchestrator and executor instances. |
Layer 3 — Skills: Power Tools
Time: 30-60 min (install your top 10)
Skills extend Claude Code with domain-specific capabilities. The LearnAI stack uses:
| Entry | What you’ll get |
|---|---|
| Claude Code 必装/进阶十大 Skill — Community-Curated Map of 20 Power Skills | The curated map: which skills to install first and why. |
| Best Claude Code Plugins | Plugin-level additions beyond individual skills. |
| Non-Coding Skills for Claude Code | Skills for writing, research, business ops — not just engineering. |
| Anthropic Knowledge Work Plugins | Role-based plugins: researcher, writer, analyst. |
Top skills to install immediately:
oh-my-claudecode(Layer 2 — already done)pua(persistence/task discipline)prompt-master(prompt engineering assistant)grill-me(Socratic learning)review-wiki-skill(for wiki/writing workflows)
Layer 4 — Codex Review Gate: Your Second-Opinion AI
Time: 15 min (understand + wire into CLAUDE.md)
The Codex review gate is a mandatory second-opinion check after every significant output. Claude Code generates; Codex critiques. Together they catch mistakes neither catches alone.
| Entry | What you’ll get |
|---|---|
| Cross-Model Code Review — Why Claude Can’t Catch Its Own Bugs | The theory: why same-model review fails; why cross-model review works. |
| Codex + Claude Code for Research — A Practical Tutorial | Hands-on workflow: how to run Codex alongside Claude Code sessions. |
| Harness Engineering — The Real Bottleneck Isn’t the Model | The big picture: why the harness (CLAUDE.md + review gate + /goal) matters more than the model. |
Wire the review gate into CLAUDE.md:
# RULE #1 — Codex Review Gate
After completing ANY task, pipe output to Codex:
echo "CONTENT" | codex exec --model gpt-5.5 --ephemeral --color never -o /tmp/codex-out.md - >/dev/null 2>/dev/null && cat /tmp/codex-out.md
Layer 5 — Spec-Driven Workflow: Write spec.md First
Time: 10 min (install the CLI + run your first interview)
Spec-driven development means writing acceptance criteria before running /goal. The interview tool takes 5 minutes and produces a spec.md that anchors every turn of the agent session.
npm install -g @weihaoqu/project-spec-interviewer-skill
project-spec-interviewer-skill
# → spec.md written to current directory

/goal Complete all tasks defined in spec.md.
      Done when: [paste done condition]
      Scope: [files listed in spec.md]
| Entry | What you’ll get |
|---|---|
| project-spec-interviewer-skill — Interactive Terminal Interview | The tool: what it asks, what it produces, why the 5-min interview beats a blank spec. |
| SpecOps — Spec-Driven Development | The methodology: how specs anchor /goal sessions and prevent drift. |
Layer 6 — Session Management: Never Lose Context
Time: 10 min
| Entry | What you’ll get |
|---|---|
| Claude Code /handover — Never Lose Context Between Sessions | The /handover skill: end-of-session memory export so the next session picks up exactly where you left off. |
| progress.md Handoff — A Scripted Codex ⇄ Claude Code Workflow | Cross-agent handoff: a tracked progress.md log + /checkpoint and /resume slash commands that work identically in Claude Code and Codex. Use when you alternate sessions between the two agents. |
| Meta Harness — The Agent That Optimizes Its Own Scaffolding | Stanford/MIT approach: the agent rewrites its own CLAUDE.md after each session. |
Mac Migration: Clone This Setup to a New Machine
Pre-built export/bootstrap scripts handle the heavy lifting. Follow these steps in order — every command is copy-paste ready.
Step 1 — Export config from the old Mac
bash ~/.claude/claude-code-export.sh ~/Desktop/claude-export
Exports: CLAUDE.md, RTK.md, RESEARCH_WORKFLOW.md, settings.json, custom commands, agents, hooks, templates, memory index.
Step 1b — Export custom skills and memory content (gap in the export script)
Your custom skill .md files are NOT included in the export above. The same is true for the content of ~/.claude/memory/ — claude-code-export.sh copies the MEMORY.md index but not the *.md content files that index points at, so the new machine would have a memory index referencing files that don’t exist. Copy both separately:
mkdir -p ~/Desktop/claude-export/skills ~/Desktop/claude-export/memory

# Custom skill files you wrote (curriculum-designer, research-kb, etc.)
cp ~/.claude/skills/*.md ~/Desktop/claude-export/skills/ 2>/dev/null || echo "no .md skills"

# Global memory content files (the MEMORY.md index alone is not enough)
if [ -d ~/.claude/memory ]; then
  rsync -a ~/.claude/memory/ ~/Desktop/claude-export/memory/
else
  echo "no ~/.claude/memory directory — skipping"
fi

# If you want ALL skill packages too (~200 dirs, potentially large):
# rsync -av --exclude='*.pyc' ~/.claude/skills/ ~/Desktop/claude-export/skills/
On the new Mac, after Step 8 restores skills, also restore the memory content. Use whichever transfer path matches Step 2:
mkdir -p ~/.claude/memory

# If transferred via Dropbox:
rsync -a ~/Dropbox/claude-export/memory/ ~/.claude/memory/

# If transferred via rsync/AirDrop:
rsync -a ~/claude-export/memory/ ~/.claude/memory/
Re-running the export?
claude-code-export.sh(Step 1) removes and recreates the export directory when it detects a prior export. That wipes anything Step 1b put there too. If you re-run Step 1, re-run Step 1b right after — don’t assume the prior memory/skill copy is still in the bundle.
Step 2 — Transfer to the new Mac
# Option A: Via Dropbox (recommended — syncs automatically)
cp -r ~/Desktop/claude-export ~/Dropbox/claude-export
# Wait for Dropbox to sync, then continue on the new Mac
# ⚠️ Dropbox Smart Sync warning: files may show in Finder but not be downloaded yet.
# Force download on the new Mac before running the bootstrap:
#   brctl download ~/Dropbox/claude-export  (if using iCloud-style Dropbox)
#   or: open ~/Dropbox/claude-export in Finder → select all → right-click → "Make Available Offline"

# Option B: Via rsync over SSH (both Macs on same network)
rsync -av ~/Desktop/claude-export/ USERNAME@NEW-MAC-IP:~/claude-export/

# Option C: AirDrop — Finder → right-click ~/Desktop/claude-export → Share → AirDrop
Step 3 — Install prerequisites on the new Mac
# Install Homebrew (macOS package manager — skip if already installed)
/bin/bash -c "$(curl -fsSL https://raw.githubusercontent.com/Homebrew/install/HEAD/install.sh)"

# Install core tools
brew install node git jq gh ffmpeg
Step 4 — Install Claude Code
npm install -g @anthropic-ai/claude-code
Step 5 — Run the bootstrap script
# If transferred via Dropbox:
bash ~/Dropbox/claude-export/claude-code-bootstrap.sh ~/Dropbox/claude-export

# If transferred via rsync/AirDrop:
bash ~/claude-export/claude-code-bootstrap.sh ~/claude-export
The bootstrap script:
- Copies CLAUDE.md, settings.json, hooks, commands, agents into
~/.claude/ - Rewrites absolute paths from
/Users/oreoto your new$HOMEautomatically - Prints all
/plugin installcommands at the end — copy and run those next
Step 6 — Install plugins (from bootstrap output)
Open Claude Code and run the plugin commands the bootstrap script printed. They look like:
# In Claude Code:
/plugin marketplace add openai/codex-plugin-cc
/plugin marketplace add jimliu/baoyu-skills
/plugin marketplace add Lum1104/Understand-Anything
/plugin marketplace add kepano/obsidian-skills
/plugin marketplace add lingfengQAQ/webnovel-writer

/plugin install ai-generation-skills@baoyu-skills
/plugin install utility-skills@baoyu-skills
/plugin install obsidian@obsidian-skills
/plugin install codex@openai-codex
/plugin install understand-anything@understand-anything
/plugin install webnovel-writer@webnovel-writer-marketplace

/reload-plugins
Step 7 — Install npm tools + RTK
# oh-my-claudecode (orchestration layer)
npm install -g oh-my-claudecode
omc setup

# Spec interview tool
npm install -g @weihaoqu/project-spec-interviewer-skill

# Codex CLI
npm install -g @openai/codex

# RTK (token-saving proxy)
brew install rust && cargo install rtk
# or: download binary from https://github.com/rust-lang/rtk/releases
Step 8 — Restore custom skills
# Copy the .md skill files exported in Step 1b
cp ~/Dropbox/claude-export/skills/*.md ~/.claude/skills/ 2>/dev/null || true

# If you also exported full skill packages, restore them:
# rsync -av ~/Dropbox/claude-export/skills/ ~/.claude/skills/
Step 8b — Migrate the progress.md handoff skills
If you use the progress.md Handoff workflow, there are two halves that need to travel:
Half 1 — User-level skill directories that back the handoff workflow (one-time per machine). These are SKILL.md files inside named subdirectories (~/.codex/skills/checkpoint/SKILL.md, etc.), NOT top-level .md files — Step 1b’s *.md glob misses them. Copy the whole directories explicitly:
# On the old Mac — add to your export
mkdir -p ~/Desktop/claude-export/skills-tree/{codex,claude}
cp -R ~/.codex/skills/checkpoint  ~/Desktop/claude-export/skills-tree/codex/
cp -R ~/.codex/skills/resume      ~/Desktop/claude-export/skills-tree/codex/
cp -R ~/.claude/skills/checkpoint ~/Desktop/claude-export/skills-tree/claude/
cp -R ~/.claude/skills/resume     ~/Desktop/claude-export/skills-tree/claude/

# On the new Mac — restore (after Dropbox/rsync transfer)
mkdir -p ~/.codex/skills ~/.claude/skills
cp -R ~/Dropbox/claude-export/skills-tree/codex/*  ~/.codex/skills/
cp -R ~/Dropbox/claude-export/skills-tree/claude/* ~/.claude/skills/
After this, in Claude Code the /checkpoint and /resume slash commands resolve in any project on the new Mac that also has the per-project handoff files from Half 2 — both halves are required. In Codex the same workflow is reachable by typing the bare trigger words checkpoint / resume (no slash; Codex doesn’t honor user-defined slash commands — the skill activates on those trigger phrases from its description and AGENTS.md).
Half 2 — Per-project handoff files (already in git for projects that have it). The script scripts/agent-handoff.sh, the project-level Claude Code slash command files .claude/commands/checkpoint.md and .claude/commands/resume.md, AGENTS.md, and the live progress.md log all live inside each repo and are tracked. For projects that already have the workflow, they come with git clone — nothing to install. For a NEW project (or one you didn’t git clone), use the one-command installer:
cd /path/to/new/project
bash ~/.claude/skills/checkpoint/install.sh
That copies the 4 files (script + 2 slash commands + AGENTS.md if absent) and adds two .gitignore entries. Idempotent and safe to re-run. Existing AGENTS.md is never overwritten — if you have one, the installer tells you what to append manually. ~/.codex/skills/checkpoint/install.sh is the mirror for running from Codex. Source path defaults to ~/Desktop/learnai-course (the canonical repo); override with PROGRESS_HANDOFF_SRC=/path/to/source if you keep it elsewhere.
progress.md is NOT copied by the installer — it’s created on your first /checkpoint in that project.
(Note on terminology: .claude/commands/checkpoint.md is a Claude Code project-level slash command (gives you /checkpoint inside that project). ~/.claude/skills/checkpoint/SKILL.md is a Claude Code user-level skill (also reachable as /checkpoint from any project — the cross-project fallback). ~/.codex/skills/checkpoint/SKILL.md is a Codex skill — but Codex doesn’t expose user skills as slash commands, it activates them on trigger phrases like checkpoint, save context, wrap up listed in the skill’s description and in AGENTS.md. So the Claude-side install gives you a slash command; the Codex-side install gives you a triggered skill. Both invoke the same scripts/agent-handoff.sh.)
The wiki entry has a Quick Reference section if you forget the daily-use commands: https://weihaoqu.github.io/learnAIDoc/wiki/progress-md-codex-handoff/
Step 9 — Authenticate Codex
codex login
Step 10 — Let Dropbox sync your projects
Install Dropbox on the new Mac, sign in, and wait for ~/Dropbox/ to sync. Your wiki (learnAIDoc/), research KB, and all project files appear automatically — no manual copying needed.
Post-Bootstrap Checklist
# Verify RTK works
rtk gain

# Check oh-my-claudecode health
omc doctor

# Verify hooks fire (run any git command in Claude Code)
git status

# Update API keys file with new machine's keys
open ~/.claude/api_keys.md
Then open Claude Code and:
- Run
/goalwith a small test task (confirms /goal + hooks work) - Run
project-spec-interviewer-skill(confirms npm tool works) - Test one Codex command:
echo "hello" | codex exec --model gpt-5.5 --ephemeral - - Set up MCP servers (Google Calendar, Gmail, Drive) if needed
What is NOT migrated by the export script
| Item | Why not | How to handle |
|---|---|---|
~/.claude/skills/*.md |
Custom files, not third-party | Step 1b + Step 7 above |
~/.claude/memory/*.md except MEMORY.md |
The script copies the MEMORY.md index but not the content .md files it references |
Step 1b (extended) above |
~/.claude/skills/ packages |
Too large, reinstall on demand | rsync if you want all of them |
~/.codex/skills/ |
Out of scope for the Claude-Code-focused export script | Mirror the ~/.claude/skills/ migration manually, or use Step 8b for the specific handoff skills |
~/.claude/projects/ |
Per-project memory | Copy if you want history; skip to start fresh |
~/.claude/history.jsonl |
Session logs, 1.6MB+ | Copy for archival; not needed for function |
| API keys | Never copy across machines | Re-enter manually in api_keys.md |
How LearnAI Team Could Use This
- Onboarding new collaborators — Send this page instead of a 2-hour setup call. New team members follow Layer 0 → 6 in order and arrive with the same environment.
- CS-310 / CS-336 student setup — Assign Layer 0-2 as Week 1 homework (Claude Code + oh-my-claudecode + first /goal session). Grade the spec.md they produce, not the code.
- Lab computer setup — When setting up a shared lab machine, use the bootstrap script and this reading path. The CLAUDE.md can be customized for research context (security analysis, type systems, etc.).
- Teaching harness engineering — Use the Layer 4 (Codex gate) + Layer 5 (spec-driven) combination as a “responsible AI workflow” module. Show students how the harness catches mistakes the model itself misses.
Real-World Use Cases
| Scenario | Which layers | Time |
|---|---|---|
| First-time Claude Code user | Layer 0 → 1 → 2 | 2 hours |
| Add skills + Codex gate to existing setup | Layer 3 → 4 | 45 min |
| Wire spec-driven workflow for a specific project | Layer 5 → run interview | 15 min |
| Clone full setup to new Mac | Mac Migration section | 30 min |
| Teach a student the full stack | Layer 0 → 5 in order, one layer per week | 5 weeks |
Important Things to Know
- CLAUDE.md is the highest-leverage file. The model, the skills, the plugins — these matter. But CLAUDE.md is where you define the rules that make all of them work together. Invest 30 minutes writing it carefully; it compounds across every session.
- Layer order matters. Don’t install 20 skills before you understand /goal. Don’t run /goal before you have a spec.md. The layers are ordered by dependency — each one makes the next more valuable.
- The export script captures config, not state. Skills, plugin caches, and session history are not exported. The new machine will feel slightly “fresh” — that’s intentional.
- Dropbox handles the content. If your projects, wiki, and research KB live in Dropbox, migration is just the
~/.claude/config transfer. The content is already synced. - Start with one /goal session. After Layer 2, don’t wait until you’ve read all layers. Run a real task through
/goalwith aspec.md. The experience teaches more than reading.